
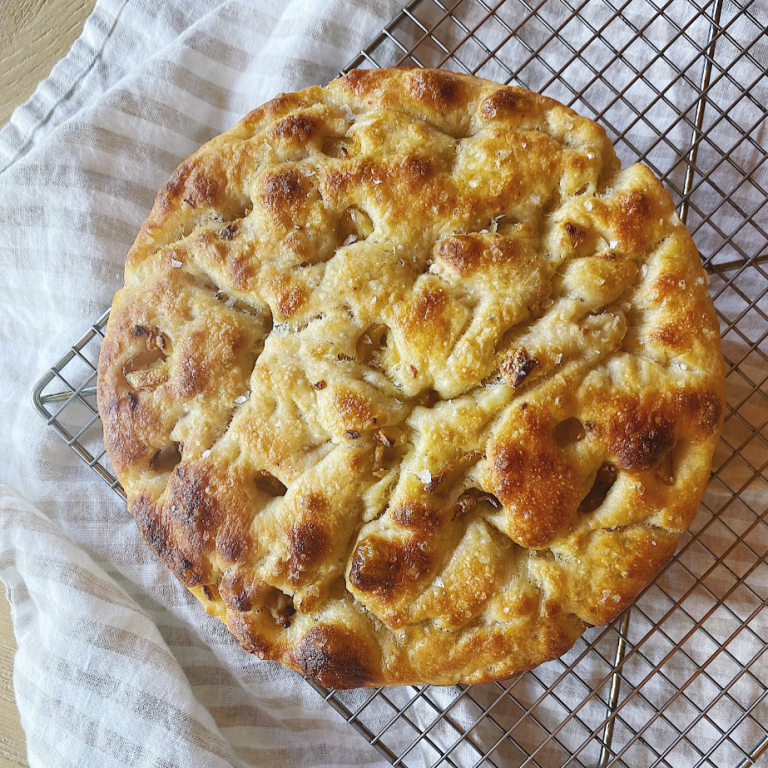
Sourdough Focaccia 101
If you’ve been following for a little while, you know that I’m pretty obsessed with baking sourdough focaccia and it’s been fun seeing so many people bake their own loaves at home! The whole process sparks so much joy for me and the reward is the most delicious, pillowy, crispy, olive-oily bread ever.
My sourdough focaccia “journey” (lol) started last year when I saw a ton of people, including my two culinary school friends, Mia and Nora making it. Upon tasting their loaves, I was convinced that I needed to learn how to do it on my own because it was SO insanely good. After doing some research online and buying allll the flour, I set on my way!
Not going to lie – it took a little bit of practice to really get it down. My first loaf was definitely delicious (looking back, it probably tasted so good because of all of the hours I spend making it haha) but as I kept practicing, my loaves turned out better and better.
Since I’ve been sharing my process on my Instagram a little bit, I’ve been getting some questions about focaccia, starter, recipes, etc. so I want to create a post where I share all of my favorite tips, equipment, recipes, resources, etc.
While I’m definitely not a pro in this arena, I’ve done a ton of research + baked a looot of loaves over the past year. I hope you find this to be a valuable resource!
SOURDOUGH STARTER
WAYS TO OBTAIN A SOURDOUGH STARTER
This may be obvious but you need a sourdough starter to make sourdough focaccia. The starter contains natural yeast, which leavens the bread but also a deep, fermented flavor that imparts the sourdough taste. It’s important that your starter is ready and active when you make focaccia – a weak starter will result in a dense loaf.
If you want to make a starter from scratch, I highly suggest following Maurizio’s guide on The Perfect Loaf. He does a great job at explaining what a starer is, how to build one from scratch, how often to feed it, etc. I’ll go into what has worked for me in the next section.
If you don’t want to make a starter from scratch, you can actually buy one online! I’ve recently heard glowing reviews about the Breadtopia one.
If you don’t want to deal with a starter at all, you can still make a great focaccia loaf, sans starter.
My favorite non-sourdough focaccia recipe is this one from Alexandra’s Kitchen. I follow the recipe pretty much to a T, but I do end up adding more oil in the baking dish than she calls for and I just skip the butter. I create about a 1/8 inch pool of oil in the baking dish (we learned in culinary school that you want to add a “holy shit that’s a lot of olive oil” amount when making focaccia, lol). I find that a good amount of olive oil ensures a super crispy crust and I’ve never had any issues with it sticking to the pan.
WHAT TO FEED YOUR STARTER AND WHEN
First, I want to explain what a feeding or refreshment entails:
When refreshing (or feeding) your starter, you’re discarding the majority of the contents of the risen/mature starter, adding a tiny amount of it to a new vessel, and adding more flour + water. Over the course of 10-12 hours, this paste will transform. The microbes in the tiny amount of mature starter you added will feed on the sugars in the flour and emit carbon dioxide, resulting in that light, bubbly, sour mixture.
It might seem like you’re throwing away an insane amount of starter during each refreshment and you may question whether it’s correct but trust me, it is! That said, you can use this sourdough “discard” to make tons of delicious recipes and prevent waste. I love making waffles and pancakes with my discard and have been meaning to try sourdough crackers too!
My preferred feeding quantities and ingredients:
10g mature starter
90g filtered, room-temp water
50g whole wheat flour
50g all-purpose flour
Quick notes on the feeding process + ingredients:
I like to combine the starter with the water as much as possible before adding the flour. Once you add the flour to the water/starter mixture, make sure you mix it well, until there are no streaks of dry flour. I like mixing with a small, seamless spatula (linked below in the equipment section) to ensure I get everything on the sides of the container mixed in.
You can use different types of flours in your feedings, as long as they total to 100g at the end of the day. I’ve tried 100g all-purpose flour before (instead of 50/50 AP and WW flour) and I haven’t seen as good of results but if that’s what you have on hand, definitely use it! Another good sub for whole wheat flour is rye flour.
Most starter refreshment “recipes” are 100% hydration. This basically means that the amount of total flour you add is equal to the amount of water you add. Mine is a little less than 100% hydration since I’m doing 90g water to 100g flour but I’ve found this works really well for me. You can totally add 100g of water if you’d like and it will turn out great too!
How often I feed my starter:
When you’re storing your starter at room temp, you should plan on feeding it twice a day – once in the morning and once at night.
The feedings should happen right at the peak of your starter’s activity – the starter will undergo bubbling/rising after each feeding. After it’s risen to it’s full capacity (about two to three times the size of when you fed it), it will begin to fall/deflate. You ideally want to feed it right at the peak of rising, before it starts to deflate on you. This happens for me between 10 and 12 hours after a feeding.
Because everyone’s starter and room temps are different, the exact time in the morning and evening at which you feed your starter will vary. If your house is on the colder side, your starter will take a bit longer to rise/fall and vice versa if it’s on the hotter side.
I recommend monitoring your starter throughout the day after feeding it and taking notes on its activity…a sourdough starter journal if you will (lol).
I also love Maurizio’s sourdough starter maintenance post. He goes into a lot of this stuff in depth!
Some notes on storing starter in the fridge:
I keep my sourdough starter in the fridge for the majority of the time. This is so that I don’t use up a bunch of flour for feedings when I’m not planning on baking bread in the immediate future. You can store your starter in the fridge once it’s mature/active. The cool air from the fridge slows down the fermentation while still preserving all of that good bacteria that enables fermentation.
I take my starter out of the fridge two to three days before I want to bake my sourdough focaccia and I feed it according to the schedule I mentioned above, leading up to the day I bake with it.
If my starter has been in the fridge for weeks, I like to feed it for three days before baking with it.
If my starter has only been in the fridge for a few days, I start feeding it two days prior to baking with it.
If you forget to feed your starter:
Once you have an active/stable starter, it’s actually really forgiving and super resilient, so it’s not the end of the world if you forget a feeding.
As mentioned, you should ideally feed the starter twice a day if you’re keeping it out at room temp. That said, if you end up forgetting one of the feedings, it’s not going to die on you. I’ve forgotten to feed my starter for a day and it ended up being totally fine once I refreshed it (please save the mom shaming comments lol).
How to tell when your starter is ready to bake with:
I’m sure a good amount of you have heard about the “float” test. This is just taking a glass of water and gently adding a small spoonful of starter into the glass. If it floats, it’s ready to bake with – it’s developed tons of air bubbles that will lend to a nice light, risen end product. If it sinks, feed it through a couple of more cycles and try again!
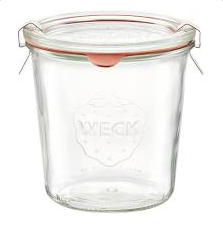
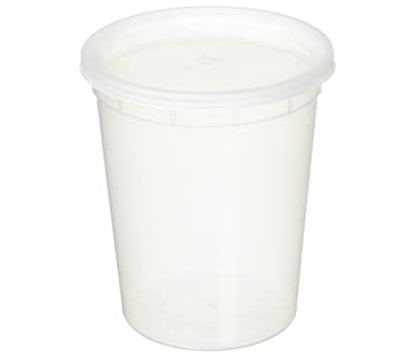
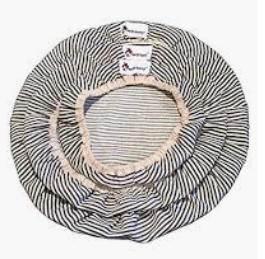
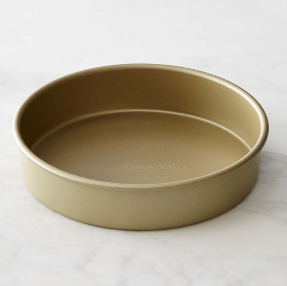
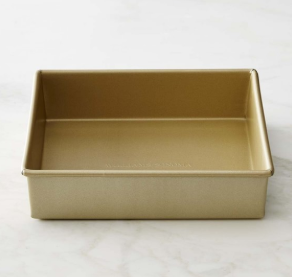
EQUIPMENT
For sourdough focaccia, you don’t need much special equipment and you most likely have most of it on hand! Below are the items I use for mine:


And now the moment we’ve all been waiting for…
SOURDOUGH FOCACCIA RECIPE
I used to follow Alexandra’s Kitchen sourdough focaccia recipe to a T but I recently tweaked the recipe and developed a ratio that I like a little bit better! I’ve written out the recipe below.

INGREDIENTS
90g mature sourdough starter (if you follow my sourdough refreshment ratio above, you will end up with enough starter for this!)
8g kosher salt
374g room temp water
435g bread flour
Extra virgin olive oil
METHOD
In a large bowl, mix the sourdough starter, salt and water with a spatula or wooden spoon until the starter begins to dissolve into the water.
Stir in the bread flour and mix just until you end up with a shaggy dough ball.
Drizzle with a little bit of olive oil and use your fingers to spread the oil into a very thin layer on top of the dough ball. I find this step to be important to avoid the top drying out while the dough bulk ferments.
Cover the bowl with a kitchen towel, cloth bowl cover or a tied plastic bag and allow to ferment at room temp until the dough has doubled in size. This timing will depend on how hot/cold your kitchen is. Mine usually takes 10 hours but this can take anywhere from 8-18 hours.
Once your dough has doubled, drizzle a little more olive oil on top and use your fingers to slightly loosen up the edges of the dough off the perimeter of the bowl.
Time to fold! Use your hand to grab a section of the dough from the perimeter of the bowl and gently lift it up + fold into the center of the bowl. Do this around the entire perimeter of the bowl until you have folder all edges into the center. While you’re folding, do your best to not deflate the dough too much. We want to preserve all of those amazing air bubbles that formed during bulk fermentation.
Once you’ve finished folding, carefully invert the dough ball into a well-oiled 9-inch round or square cake pan. There should be enough oil to completely coat the bottom of the pan. I like to create a nice pool of oil that is about 1/8-inch deep.
Allow the dough to ferment for another 5-6 hours in the oiled pan. By the end of this, the dough will have risen even more and you will see bubbles forming throughout.
Lightly oil your fingers (I just dip them in the oil from the edges of the pan) and drizzle a little bit of oil on top of the dough. With your hands in a claw-like formation, use all ten fingers to dimple the dough throughout.
Drizzle the top with a little more olive oil, sprinkle with flaky sea salt and add toppings if you’d like (notes on toppings below!).
Bake in a 425 F oven for 25-30 minutes, or until the focaccia is cooked through and brown on top.
Carefully remove the loaf from the pan immediately after removing from the oven (I use a couple of spatulas to help me out) and transfer to a rack to cool. This ensures that the focaccia doesn’t get soggy on the bottom by bathing in the oil as it’s cooling.
Brush the top of the focaccia with any excess oil left over in the pan – it gives the top a nice glistened look.
Ideally, wait about 30 minutes before slicing into the focaccia (but let’s be real – this rarely happens!). Enjoy!
TOPPING IDEAS
I’ve listed some of my favorite toppings for focaccia below. These are toppings that I’ve personally baked with, along with some that I have high on my list to try! I did a poll a little while back on my Instagram where I asked for toppings suggestions, so I’ve also added some of those as well!
You can assume that everything has flaky sea salt sprinkled on top of it (salt = life). I like Maldon and Jacobson the best but feel free to use what you prefer. I also like to add smoked sea salt when I’m feeling crazy – it pairs really nicely with a ton of the toppings I listed below.
It’s also worth noting that while I love focaccia with toppings, I have an unmatched love for straight up focaccia with flaky salt on top. You don’t need much when you have an amazing, flavorful focaccia base but the toppings are a really delicious addition and fun to play around with!

You can mix and match any of these – I’ve included some of my favorite combinations below, too.
TOPPINGS
Rosemary (dried or fresh)
Thyme (dried or fresh)
Oregano (dried or fresh)
Herbs de Provence
Fennel seed
Roasted garlic cloves, whole
Olives (I love castelvetrano and kalamata – make sure the pit is removed)
Green onion, sliced
Red onion, thinly sliced
Caramelized onions
Caramelized leeks
Capers
Artichoke hearts
Concord grapes (sounds weird but is seriously so good!)
Cherry tomatoes, halved
Sundried tomatoes
Roasted fennel
Fresh jalapeno
Fresh fresno chili
Feta Cheese (a softer/creamier feta is best)

FAVORITE COMBINATIONS
While a foccacia loaf with pretty much all of these toppings at once would actually be amazing, I’ve put a list together of a few of my recommended flavor combinations.
Rosemary + smoked sea salt
Rosemary + thinly sliced red onion
Cherry or sundried tomatoes + kalamata olives + oregano + feta
Caramelized onions + grapes + thyme
Artichoke hearts + cherry tomatoes
Caramelized leeks + sliced green onion
Roasted fennel + fennel seed
Feta + Herbs de Provence
Castelvetrano olives + capers
Would love to see your sourdough focaccia creations – let me know if you end up using this guide to bake your next loaf!